Category: Manuals (page 5 of 5)

chem lab manual

This manual provides essential guidelines for conducting chemistry experiments safely and effectively. It outlines lab rules, safety protocols, and proper procedures for handling equipment and chemicals.

1.1 Overview of the Lab Manual

The lab manual serves as a comprehensive guide for students and researchers, detailing essential procedures, safety protocols, and best practices for conducting chemistry experiments. It covers fundamental concepts, equipment usage, and chemical handling to ensure a safe and efficient laboratory environment. The manual is structured to align with course curricula, providing clear instructions for experiments and data interpretation. It emphasizes environmental awareness, proper waste disposal, and maintenance of glassware. Regular updates reflect advancements in laboratory practices and safety standards. This resource is indispensable for developing practical skills and fostering a deeper understanding of chemical principles. It also encourages adherence to ethical practices and responsible laboratory conduct.

1.2 Importance of Safety in the Lab

Safety is paramount in chemistry laboratories to prevent accidents, injuries, and environmental hazards. Adhering to safety protocols ensures a secure working environment and protects individuals from chemical and physical risks. Key measures include wearing protective gear like lab coats and goggles, avoiding ingestion of chemicals, and following proper waste disposal procedures. Students must be aware of emergency exits, fire extinguishers, and first aid kits. Strict adherence to lab rules, such as no eating or drinking, is crucial. Proper training and awareness of potential hazards minimize risks and foster a culture of responsibility. Safety practices also extend to maintaining clean workspaces and correctly handling equipment to avoid mishaps.

Lab Safety Rules and Regulations

Lab safety rules ensure a secure environment by requiring protective gear, proper chemical handling, and adherence to emergency procedures. Compliance with regulations is mandatory for all participants.

2.1 General Safety Guidelines

General safety guidelines are crucial for maintaining a secure lab environment. Students must wear lab coats, safety goggles, and closed-toe shoes. Eating, drinking, and chewing gum are strictly prohibited. Avoiding distractions and staying focused during experiments is essential. Hands should be washed thoroughly before and after handling chemicals. Unauthorized experiments are not permitted, and all procedures must be approved by instructors. Familiarize yourself with emergency exits, fire extinguishers, and first aid kits. Never taste or smell chemicals, and handle hazardous materials with care. Proper ventilation is necessary when working with volatile substances. Follow all instructions carefully and clean up spills immediately to prevent accidents. Familiarize yourself with emergency protocols before starting any experiment.

2.2 Protective Equipment and Apparel

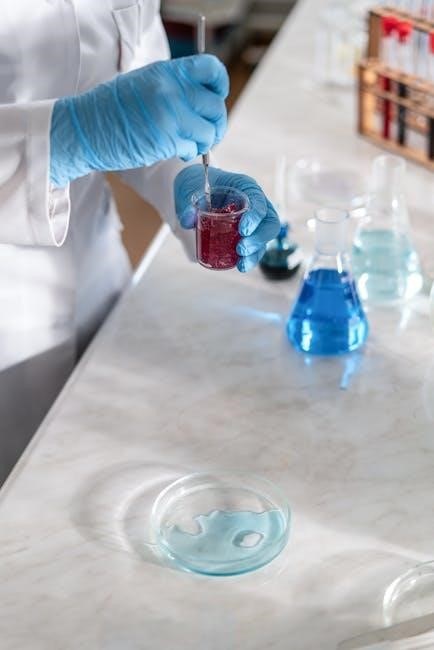
Protective equipment and apparel are essential for safeguarding against chemical and physical hazards in the lab. A lab coat must be worn to protect clothing from spills and splashes. Safety goggles or glasses with a splash guard are required to prevent eye exposure to chemicals. Gloves should be used when handling hazardous substances or hot equipment. Closed-toe shoes are mandatory to protect feet from dropped objects. Long hair and loose jewelry should be secured to avoid accidents. Ensure all protective gear is in good condition and properly fitted. Familiarize yourself with the appropriate personal protective equipment (PPE) for each experiment. Adherence to these guidelines minimizes risks and ensures a safe working environment for all lab participants.

2.3 Emergency Procedures and First Aid

In case of emergencies, immediate action is crucial to prevent injury and minimize damage. For fires, evacuate the area, alert others, and use a fire extinguisher if trained. Chemical spills should be contained using absorbent materials, and the area should be ventilated. In case of skin or eye exposure, flush with water for at least 15 minutes. For burns, cool the affected area with running water and seek medical attention. If chemicals are inhaled, move to fresh air and administer oxygen if available. First aid kits should be readily accessible, and all incidents must be reported to the instructor. Proper emergency preparedness ensures a safe and responsive lab environment.

Essential Lab Equipment and Materials

Common lab equipment includes beakers, test tubes, Bunsen burners, and pipettes. Essential materials are glassware, chemicals, and personal protective equipment like gloves and goggles for safe operations.

3;1 Common Lab Equipment

Common lab equipment includes beakers, test tubes, Bunsen burners, pipettes, and measuring cylinders. These tools are essential for mixing, heating, and measuring substances. Beakers are used for holding liquids, while test tubes are ideal for chemical reactions. Bunsen burners provide controlled heat, and pipettes accurately measure liquid volumes. Other equipment like crucibles and glass rods are used for specific tasks. Proper handling and maintenance of these tools ensure safety and precision in experiments. Lab manuals often detail their usage, emphasizing the importance of understanding each instrument’s function to achieve accurate results.

3.2 Chemicals and Reagents

Chemicals and reagents are fundamental components in laboratory experiments, serving as reactants, solvents, or standards. Commonly used chemicals include acids, bases, salts, and organic solvents like acetone and ethanol. Reagents are typically of high purity to ensure accurate results. Proper handling, storage, and labeling of these substances are crucial to maintain safety and prevent contamination. Lab manuals often provide detailed information on the safe use and disposal of chemicals. Understanding the properties and hazards of each chemical is essential for conducting experiments effectively. Always refer to safety data sheets (SDS) for specific handling instructions to minimize risks in the laboratory environment.

Conducting Experiments

Conducting experiments involves following detailed procedures, using materials and equipment properly, adhering to safety protocols, and accurately recording data to ensure reliable and reproducible results.

4.1 Preparing for an Experiment

Preparation is crucial for a successful experiment. Review the lab manual to understand objectives, materials, and procedures. Gather all required equipment and chemicals, ensuring they are in good condition. Familiarize yourself with safety protocols and wear appropriate protective gear. Read the experiment introduction to grasp key concepts and expected outcomes. Plan your workspace to optimize efficiency and safety. Double-check the availability of emergency equipment like fire extinguishers and first aid kits. Organize data collection tools, such as notebooks and calculators, to record observations accurately. Finally, consult with instructors if any steps are unclear to ensure a smooth and safe experiment process from start to finish.

4.2 Following Lab Procedures

Adhering to lab procedures ensures safety, accuracy, and reproducibility of experiments. Begin by carefully reading and understanding the provided manual or protocol. Follow the step-by-step instructions precisely, avoiding deviations unless instructed. Use laboratory equipment and instruments correctly, as improper handling can lead to errors or hazards. Record observations and data systematically, ensuring accuracy and completeness. Maintain a clean workspace to prevent contamination and accidents. Handle chemicals with care, using appropriate protective equipment and following disposal guidelines. Stay attentive and methodical throughout the experiment, and consult instructors if uncertainties arise. Properly shut down equipment and clean up glassware and surfaces after completion. Timely reporting of any incidents or spills is crucial for maintaining a safe environment.

Chemical Waste Management

Proper chemical waste disposal is crucial for safety and environmental protection. Separate solid and liquid waste, use appropriate methods, and rinse thoroughly with distilled water.

5.1 Proper Disposal of Chemicals

Proper disposal of chemicals ensures safety and environmental protection. Separate solid and liquid waste, using designated containers for each. For organic materials, dissolve them in acetone before disposal. Inorganic substances should be neutralized if hazardous. Always rinse glassware with distilled water after disposal. Follow specific guidelines for reactive or toxic chemicals, such as placing them in sealed containers. Dispose of unknown or unstable compounds with extreme caution. Consult lab manuals or instructors for specific protocols. Proper labeling of waste containers is essential for safe handling. Adhere to local and institutional regulations to minimize environmental impact. Never pour chemicals down drains without verification. Strict adherence ensures a safer lab environment and reduces ecological risks.

5.2 Cleaning and Maintaining Glassware

Cleaning and maintaining glassware is crucial for accurate experiments and safety. Rinse all glassware with distilled water after use to prevent residue buildup. For stubborn stains, soak in soap solution or chromic acid. Avoid using abrasive materials that may scratch surfaces. Dry glassware thoroughly with lint-free cloth or in a drying rack to prevent water spots. Store glassware in a clean, dry area to avoid contamination. Regularly inspect for cracks or damage to ensure integrity. Proper maintenance extends the lifespan of glassware and ensures precise experimental results. Always follow specific cleaning procedures for contaminated or sensitive equipment. Cleanliness and organization are key to efficient lab operations and safety.

Common Chemistry Experiments

Common experiments include titration, volumetric analysis, and synthesis of compounds. These activities demonstrate fundamental chemical principles and develop practical laboratory skills for students.

6.1 Titration and Volumetric Analysis

Titrations are fundamental experiments in chemistry, involving the reaction of a solution of known concentration with another of unknown concentration. Volumetric analysis focuses on precise measurement of solution volumes to determine concentrations. Common techniques include acid-base titrations, where indicators signal the endpoint. Students learn to use burettes, pipettes, and volumetric flasks for accurate measurements. These experiments teach stoichiometric calculations, precision, and error analysis. Safety measures, such as wearing goggles and lab coats, are emphasized. Proper disposal of chemicals is essential to minimize environmental impact. These experiments are critical for understanding chemical reactions and quantification, forming a cornerstone of laboratory training. They also help develop analytical and problem-solving skills in chemistry.

6.2 Synthesis and Characterization of Compounds

This section focuses on experiments involving the preparation and analysis of chemical compounds. Students learn to synthesize substances through reactions like acid-base interactions or precipitation. Techniques such as filtration, drying, and purification are emphasized. Characterization involves identifying physical and chemical properties, such as melting points, solubility, and spectroscopic data. These experiments often use reagents like Pb(NO3)2 and KI to demonstrate chemical principles. Safety measures, including proper handling of hazardous materials, are highlighted. Experiments are designed to illustrate fundamental chemical reactions and property-structure relationships. Students gain hands-on experience in chemical synthesis and analytical methods, fostering a deeper understanding of chemical behavior and laboratory techniques.

black and decker microwave manual

Welcome to the Black & Decker microwave manual‚ your comprehensive guide to safe and efficient appliance operation. This manual provides essential information on installation‚ features‚ and maintenance to ensure optimal performance and longevity of your microwave oven. By following the instructions‚ you can maximize cooking convenience while adhering to safety guidelines. For detailed instructions‚ visit the official Black & Decker website or download the PDF manual specific to your model.

1.1 Importance of Reading the Manual

Reading the Black & Decker microwave manual is crucial for safe and effective appliance operation; It provides detailed safety precautions‚ proper usage guidelines‚ and maintenance tips to prevent accidents and extend the product’s lifespan. The manual also explains how to use advanced features like digital controls and child safety locks. Understanding the intended use of your microwave‚ such as heating appropriate foods and avoiding excessive radiation exposure‚ ensures optimal performance. Refer to the official Black & Decker website for PDF downloads or visit ManualsLib for additional resources.

1.2 Overview of the Black and Decker Microwave Product Line

Black & Decker offers a diverse range of microwave ovens designed for convenience and efficiency. Their product line includes models with digital controls‚ preset settings‚ and child safety locks‚ ensuring user-friendly operation. Available in various sizes and power levels‚ these microwaves cater to different kitchen needs. Key features like turntables and push-button doors enhance functionality. Models such as the EM031MB11 and EM720CB7 showcase stainless steel finishes and compact designs. Whether for small spaces or large families‚ Black & Decker microwaves provide reliable performance. Visit their official website or ManualsLib for detailed product specifications.

Key Features of Black and Decker Microwaves

Black & Decker microwaves feature digital controls‚ preset settings‚ and child safety locks for convenience and security. They also include turntables and vary in power levels and sizes.

2.1 Digital Controls and Preset Settings

Black & Decker microwaves feature intuitive digital controls and preset settings for easy operation. These controls allow users to select from various cooking options‚ including defrosting‚ reheating‚ and specific power levels. Preset settings streamline common tasks‚ ensuring consistent results. Models like the EM031MB11 and EM720CB7 offer these features‚ making cooking faster and more convenient. The digital interface is user-friendly‚ with clear displays and simple navigation‚ catering to both experienced users and newcomers. These settings enhance efficiency and simplify meal preparation for a wide range of dishes.

2.2 Child Safety Lock and Security Features

Black & Decker microwaves incorporate a child safety lock to prevent accidental operation‚ ensuring enhanced security for families. This feature requires a specific button sequence to activate or deactivate‚ safeguarding against unintended use. Models like the EM031MB11 and EM720CB7 include this lock‚ providing peace of mind for parents. The security features are designed to comply with safety standards while maintaining ease of use. These locks prevent unauthorized access‚ making the microwave safer for households with children without compromising functionality or convenience.

Installation and Setup Guide

Proper installation ensures safe and efficient operation. Place the microwave on a stable‚ flat surface‚ away from heat sources. Ensure correct electrical connections and follow leveling instructions for optimal performance.

3.1 Choosing the Right Location for Your Microwave

Selecting the right location for your Black & Decker microwave is crucial for safety and efficiency. Ensure the area is well-ventilated‚ away from direct sunlight‚ and moisture. Place the microwave on a stable‚ flat surface to prevent tipping. Avoid installing it near flammable materials or heat sources. Keep it out of children’s reach and ensure proper clearance from walls for airflow. Choose a location with easy access to a power outlet‚ avoiding extension cords. Proper placement enhances performance and safety‚ adhering to the manual’s guidelines.

3.2 Leveling and Securing the Appliance

Proper leveling and securing of your Black & Decker microwave are essential for safe operation. Use a spirit level to ensure the appliance is evenly balanced on its feet. If necessary‚ adjust the leveling feet to achieve stability. Secure the microwave to prevent tipping by installing anti-tip brackets‚ as recommended in the manual. Ensure all screws and fasteners are tightly secured. A stable and level installation minimizes vibration and enhances safety‚ adhering to the manufacturer’s guidelines for optimal performance and longevity of the appliance.

Safe Usage and Precautions

Always follow safety guidelines when using your Black & Decker microwave. Avoid exposing food to excessive microwave energy‚ which can cause overheating. Never heat eggs in shells or sealed containers‚ as they may explode. Keep children away during operation and ensure the oven is properly ventilated. Always follow the manufacturer’s instructions to avoid accidents and ensure safe cooking.

4.1 Understanding Microwave Radiation and Safety Tips

Microwave radiation uses electromagnetic waves to heat food and beverages. Ensure safe operation by following guidelines to avoid exposure. Never stand too close or lean over the oven while it’s running. Avoid heating sealed containers or metal objects‚ as they can cause sparks or explosions. Always use microwave-safe dishes and utensils. Keep the oven clean and well-maintained to prevent malfunction. Follow recommended cooking times and power levels to avoid overheating food. Proper ventilation is essential to prevent moisture buildup. Always prioritize safety when using your Black & Decker microwave.

4.2 Avoiding Exposure to Excessive Microwave Energy

To prevent exposure to excessive microwave energy‚ ensure your Black & Decker microwave is in good working condition. Regularly inspect the door seals for damage or wear. Never operate the microwave if the door is damaged or if it does not close properly. Avoid overheating food or liquids‚ as this can create excessive steam or energy release. Always follow recommended cooking times and power levels. If you notice unusual sparks or arcing‚ stop use immediately and contact customer support. Maintain proper ventilation to reduce moisture buildup. Adhere to these precautions to ensure safe and efficient operation.

Operating the Black and Decker Microwave

Operating your Black & Decker microwave is straightforward with its user-friendly digital controls and preset settings. Always follow safety guidelines for optimal performance and efficiency.

5.1 Basic Cooking and Reheating Instructions

For basic cooking and reheating‚ place food in a microwave-safe container and set the desired power level and cooking time using the digital controls. Ensure the turntable is properly positioned for even heating. Start the microwave and let it run until the cycle completes. Always use microwave-safe utensils and follow recommended cooking times to avoid overheating. Refer to the user manual for specific guidelines tailored to your Black & Decker model‚ such as the EM031MB11 or EM720CB7‚ to achieve optimal results safely and efficiently.

5.2 Using the Turntable and Cooking Accessories

Always place dishes on the turntable to ensure even cooking and defrosting. Check that no utensils or food items obstruct its rotation. Clean the turntable regularly to prevent food residue buildup. Use microwave-safe containers and accessories‚ avoiding metal or aluminum foil. For optimal performance‚ align the turntable with the oven’s center and ensure it rotates freely; Refer to your Black & Decker microwave manual for specific guidelines on using the turntable and compatible cooking accessories safely and effectively.

Maintenance and Troubleshooting

Regularly clean your Black & Decker microwave to prevent food residue buildup. Check for worn-out parts and address common issues like uneven heating or malfunctioning buttons promptly.

  • Clean interior and accessories with mild detergent and water.
  • Inspect door seals for damage to ensure proper closure.
  • Refer to the manual for DIY solutions or contact support for complex problems.

6.1 Cleaning the Microwave Oven and Accessories

Cleaning your Black & Decker microwave regularly is crucial for maintaining its performance and hygiene. Use a mild detergent and warm water to wipe down the interior and exterior surfaces. Avoid abrasive cleaners or sharp objects that may damage the finish. For tough stains‚ mix equal parts water and white vinegar in a microwave-safe bowl and heat for 2-3 minutes to loosen food residue. Clean the turntable and accessories separately with soap and water. After cleaning‚ dry all parts thoroughly to prevent water spots and ensure proper functioning.

  • Wipe interior walls and ceiling with a damp cloth.
  • Sanitize the turntable and rotating ring regularly.
  • Check and clean the door seals for optimal closure.

6.2 Common Issues and DIY Solutions

Addressing common issues with your Black & Decker microwave can often be resolved with simple DIY solutions. If the microwave does not turn on‚ check the power cord connection and ensure the door is closed properly. For uneven cooking‚ verify that the turntable is rotating freely and clean any food residue. If noise occurs during operation‚ inspect for obstructions or food particles causing arcing. Refer to the troubleshooting section in the manual for detailed guidance. Always unplug the appliance before attempting repairs.

  • Issue: Microwave not heating – Check power supply and ensure controls are set correctly.
  • Issue: Strange noises – Clean interior and ensure turntable is aligned properly.

Accessing Additional Resources

For further assistance‚ visit the official Black & Decker website to download user manuals or contact customer support. Additional resources are available on ManualsLib and other trusted platforms.

7.1 Downloading the User Manual Online

To download the Black & Decker microwave manual‚ visit the official website or platforms like ManualsLib. Search by model number‚ and access PDF guides for detailed instructions. Ensure you have the correct model to download the appropriate manual. This resource provides troubleshooting tips‚ maintenance advice‚ and operational guidelines. Downloading the manual is free and convenient‚ offering instant access to essential information for optimal appliance use and safety.

7.2 Contacting Black and Decker Customer Support

For assistance with your Black & Decker microwave‚ visit the official website or contact customer support directly. The Help Center offers FAQs‚ community forums‚ and direct contact options. Reach support via phone‚ email‚ or live chat for inquiries or issues. Ensure to have your model number ready for efficient service. Customer service hours and contact details are available on the Black & Decker website. This resource is ideal for troubleshooting‚ warranty inquiries‚ or registering your product. Visit Black & Decker for more information.

you are here an owner’s manual for dangerous minds

This manual, published in 2017, empowers unconventional thinkers to embrace their unique perspectives. It blends humor with practical advice, helping individuals navigate the challenges of a “dangerous mind.”

Understanding the Concept of a “Dangerous Mind”

A “dangerous mind” refers to individuals who think unconventionally, often challenging societal norms and expectations. These minds are characterized by intense curiosity, creativity, and a tendency to question authority. While such traits can lead to innovation and progress, they also carry risks, such as social isolation or misinterpretation. The concept balances the line between genius and potential instability, emphasizing the need for guidance to harness these qualities positively. This manual serves as a guide to navigate the complexities of such a mindset, providing tools to thrive while maintaining mental well-being.

The Purpose of the Manual: Empowering Unconventional Thinkers

The manual aims to empower individuals with unconventional thinking by providing practical strategies and humor. It helps readers embrace their unique perspectives and turn potential challenges into opportunities. By offering guidance on managing creativity and resilience, the manual enables thinkers to thrive despite societal pressures. The goal is to foster a mindset that values innovation and critical thinking while maintaining mental health. This approach ensures that “dangerous minds” can navigate life’s complexities with confidence and purpose.

What Makes a Mind “Dangerous?”

A dangerous mind is characterized by curiosity, creativity, and a tendency to question norms boldly. It thrives on innovation but often walks the line between genius and madness.

The Role of Curiosity and Questioning the Status Quo

Curiosity drives dangerous minds to challenge established norms, fostering innovation. Questioning the status quo encourages critical thinking, leading to new ideas and perspectives. This mindset often sparks creativity and progress.

The Power of Creativity and Innovation

Creativity and innovation are cornerstones of dangerous minds, enabling individuals to think outside conventional boundaries. These traits not only solve problems but also create new opportunities. Embracing creativity allows for unique solutions and progress.

The Fine Line Between Genius and Madness

The line between genius and madness is often blurred, as unconventional thinking can lead to groundbreaking ideas or chaos. Dangerous minds frequently challenge norms, making it hard to distinguish brilliance from instability. This duality requires balance.

Strategies for Managing a Dangerous Mind

Mastering critical thinking and resilience helps dangerous minds stay focused and productive, turning potential chaos into innovation and growth. This section explores effective tactics for mental balance.

Embracing Critical Thinking and Skepticism

Critical thinking and skepticism are essential tools for managing a dangerous mind. By questioning assumptions and challenging the status quo, individuals can filter out distractions and focus on meaningful ideas. This approach helps in avoiding pitfalls like confirmation bias and groupthink, which can hinder creativity and innovation. Skepticism encourages a deeper examination of information, promoting a more informed perspective. These skills are vital for turning potentially chaotic thoughts into structured, productive outcomes. Embracing critical thinking fosters mental clarity and resilience, enabling dangerous minds to navigate societal pressures effectively while maintaining their unique viewpoint. This mindset is key to unlocking true potential and driving positive change.

Channeling Dangerous Thoughts into Productive Outcomes

Dangerous thoughts, when harnessed correctly, can become the catalyst for innovation and progress. The manual emphasizes the importance of redirecting these thoughts into creative endeavors, such as writing, art, or problem-solving. By providing a constructive outlet, individuals can transform potentially destructive ideas into positive contributions. This approach not only benefits the individual but also society, as unconventional thinking often leads to groundbreaking solutions. The key is to balance creativity with discipline, ensuring that dangerous thoughts are expressed in a way that is both meaningful and beneficial. This strategy fosters personal growth and turns what might be perceived as a liability into a valuable asset.

Building Resilience Against Societal Pressure

Societal pressure often seeks to conform unconventional thinkers into the mainstream, stifling creativity and innovation. The manual highlights the importance of resilience in maintaining one’s unique perspective. By fostering self-awareness and setting boundaries, individuals can resist the urge to conform. Embracing individuality and finding like-minded communities can further bolster this resilience. The key is to balance societal expectations with personal authenticity, ensuring dangerous minds remain a force for positive change rather than succumbing to external pressures. This resilience not only protects the individual but also preserves the creativity that society often needs to progress. Resilience, therefore, is both a shield and a catalyst for growth.

The Role of Humor in Navigating Dangerous Thinking

Humor acts as a powerful tool to challenge authority and find balance in unconventional thinking. It helps dangerous minds navigate absurdity while maintaining perspective and sanity.

Using Wit to Challenge Authority

Wit is a sharp, intelligent way to question authority without direct confrontation. By using clever language and irony, dangerous minds can challenge norms while maintaining a layer of humor. This approach makes disruptive ideas more palatable, allowing for critique without immediate backlash. Wit fosters creativity and resilience, enabling individuals to navigate societal expectations while staying true to their unconventional perspectives. It’s a tool for rebellion that respects boundaries, making it both effective and respectful. Historical figures and modern thinkers alike have harnessed wit to spark change, proving its power in balancing rebellion with diplomacy.

Laughing at the Absurdity of Life

Life’s absurdities often lie in its contradictions and unpredictability. Dangerous minds find humor in these paradoxes, using laughter as a coping mechanism. By acknowledging the absurd, individuals can detach from societal pressures, embracing their uniqueness. This perspective fosters resilience, allowing them to thrive in chaos. Laughter becomes a tool for self-expression, validating unconventional views. It bridges the gap between madness and genius, offering a fresh outlook. Humor, in this context, is both a shield and a bridge, protecting while connecting. It’s a powerful way to navigate life’s complexities, turning challenges into opportunities for growth and understanding.

Mental Health and the Dangerous Mind

Recognizing burnout and stress is crucial for unconventional thinkers. Seeking support helps maintain mental balance, fostering resilience against societal pressures and nurturing a healthy, dangerous mind.

Recognizing the Signs of Burnout and Stress

For unconventional thinkers, burnout and stress often manifest as emotional exhaustion or creative blocks. Signs include prolonged fatigue, irritability, and a decline in problem-solving skills. These individuals may feel overwhelmed by societal expectations or internal pressures to innovate. Neglecting these signs can lead to diminished creativity and physical symptoms like insomnia or anxiety. The manual emphasizes the importance of self-awareness and early intervention. By identifying these indicators, dangerous minds can take proactive steps to manage stress, such as practicing mindfulness or setting boundaries. Acknowledging vulnerability is the first step toward maintaining mental health and sustaining their unique, innovative perspectives.

Seeking Support for Unconventional Thinkers

Unconventional thinkers often face unique challenges, making support systems crucial for their well-being. The manual encourages seeking help from like-minded individuals or professionals who understand their perspective. Building a network of peers who embrace creativity and innovation can provide emotional and intellectual backing. Additionally, therapy or counseling tailored to their needs can help navigate the pressures of societal expectations. Open communication and shared experiences foster a sense of belonging, reducing feelings of isolation. By seeking support, dangerous minds can maintain their innovative edge while fostering mental and emotional resilience. This approach ensures they thrive without compromising their unique way of thinking.

Embracing your dangerous mind is about harnessing its power to transform challenges into opportunities. It’s a journey of self-acceptance, resilience, and turning unconventional thinking into a strength.

Embracing Your Unique Perspective

Embracing your unique perspective is at the heart of owning your dangerous mind. It’s about recognizing that your unconventional thoughts and ideas are not liabilities but strengths. This manual encourages you to lean into your curiosity and creativity, even when they challenge the status quo. By doing so, you not only find personal fulfillment but also contribute to a world that often needs new ways of thinking. The book reminds us that humor and resilience are key tools in navigating societal expectations and pressures. Ultimately, embracing your unique perspective is an act of courage and self-acceptance, turning what others might see as dangerous into a source of innovation and progress. It’s about celebrating who you are and what you bring to the table.

Turning Danger into Opportunity

“You Are Here: An Owner’s Manual for Dangerous Minds” emphasizes transforming unconventional ideas into opportunities. By channeling curiosity and creativity, individuals can turn perceived risks into innovative solutions. The book highlights how humor and resilience play crucial roles in navigating societal pressures and leveraging dangerous thoughts for productivity. It encourages embracing challenges as stepping stones for personal and societal progress, illustrating how dangerous minds can drive meaningful change. The manual provides practical advice to help readers convert their unique perspectives into actionable outcomes, fostering a mindset where danger becomes a catalyst for growth and innovation.

fujitsu ac manual

Safety Precautions

Always read the manual thoroughly before use to prevent injury or damage. Avoid touching electrical parts with wet hands, inserting sharp objects, or climbing on the unit. Ensure proper installation by qualified personnel only to maintain safety and efficiency.

1.1 General Safety Guidelines

Always read the manual carefully before operating your Fujitsu AC. Ensure the unit is installed by qualified personnel to avoid hazards. Never touch electrical components with wet hands or insert sharp objects into the unit. Keep the area around the AC clear of obstructions and avoid climbing on or hanging objects from it. Prevent electric shock by turning off the unit during thunderstorms and avoiding contact with power plugs.

1.2 Safety Precautions During Installation

Ensure installation is performed by qualified personnel only, as improper installation can cause electrical hazards or refrigerant leaks. Handle refrigerant R410A with care, avoiding direct contact. Keep the power supply off during installation to prevent electric shock. Never attempt to modify or repair internal components yourself, as this can lead to serious safety risks and void the warranty. Always follow the manufacturer’s installation guidelines precisely to ensure safe and efficient operation.

1.3 Safety Precautions During Operation

Never insert sharp objects into the unit or touch electrical parts with wet hands to avoid electric shock. Keep the air conditioner out of reach of children and pets. In case of thunderstorms, turn off the unit using the remote controller and avoid touching it. Regularly inspect the power cord for damage and ensure it remains dry. Always follow the recommended operating procedures to maintain safety and efficiency.

Understanding Your Fujitsu AC Components

Familiarize yourself with the indoor unit, outdoor unit, and remote controller. Key components include air filters, coils, and fans, ensuring efficient cooling and operation.

2.1 Indoor Unit Components

The indoor unit of your Fujitsu AC includes essential components like the air filter, evaporator coil, fan, and remote sensor. These parts work together to circulate cooled air, maintain humidity, and ensure efficient operation. Regular cleaning of the air filter is recommended to optimize performance and indoor air quality. Always refer to the manual for specific maintenance instructions.

2.2 Outdoor Unit Components

The outdoor unit contains key components such as the compressor, condenser coil, fan, and refrigerant lines. These parts are essential for heat dissipation and refrigerant circulation. Ensure the unit is installed on a firm, level base and protected from direct sunlight and weather exposure. Proper drainage and clearance around the unit are crucial for efficient operation. Always follow the manual’s installation guidelines for optimal performance.

2.3 Remote Controller Overview

The remote controller allows you to adjust temperature, select modes, and set timers. It includes buttons for fan speed, airflow direction, and mode selection. Ensure batteries are installed correctly for proper operation. The controller uses infrared signals to communicate with the indoor unit. Always maintain a clear line of sight between the remote and the unit for reliable functionality.

Operating Your Fujitsu Air Conditioner

Start with basic settings, then use the remote to adjust temperature, fan speed, and mode. Utilize timers and energy-saving features for optimal performance.

3.1 Basic Operation Instructions

Press the ON/OFF button on the remote to start the air conditioner. Select the desired mode (Cool, Heat, Fan, or Dry) using the MODE button. Adjust the temperature with the TEMP buttons and fan speed with the FAN button. Use the SWING function to control air flow direction. Set timers for automatic operation using the TIMER button. Ensure the remote has clear line of sight to the indoor unit for proper function.

3.2 Advanced Features and Settings

The Fujitsu AC offers advanced features like silent operation mode for reduced noise and turbo mode for faster cooling or heating. Use the smart sensor to detect human presence and optimize energy use. The ionizing filter improves air quality, while the auto-restart function resumes operation after a power outage. Adjust settings via the remote or program timers for customized comfort and efficiency.

3.3 Timer and Scheduling Options

The Fujitsu AC allows you to set ON and OFF timers for automatic operation. Use the remote controller to program start and stop times, optimizing energy use. Combine timers for advanced scheduling, ensuring your space remains comfortable without manual adjustments. This feature helps reduce energy consumption and maintains consistent temperatures, enhancing convenience and efficiency for daily use.

Troubleshooting Common Issues

Check error codes like E1 or E2 in the manual for solutions; Ensure filters are clean and power supply is stable. Reset the unit if issues persist.

4.1 Common Error Codes and Solutions

Common error codes like E1 (communication issues), E2 (thermistor problems), E3 (refrigerant issues), and E4 (drainage problems) can occur. Refer to the manual for specific solutions. Ensure proper installation, clean filters, and stable power supply. Resetting the unit or consulting a professional may resolve persistent issues. Always follow the manual’s troubleshooting guide for accurate solutions.

4.2 Resetting Your Air Conditioner

To reset your Fujitsu air conditioner, turn it off, unplug it, and wait 10 minutes. Plug it back in and restart. This process can resolve minor issues like error codes or uneven cooling. If the problem persists, consult the manual or contact a professional for assistance. Regular resets can help maintain optimal performance and prevent operational issues.

Maintenance and Care

Regular maintenance ensures optimal performance. Clean the air filter monthly and inspect for damage. Schedule professional servicing annually to maintain efficiency and longevity of your Fujitsu AC.

5.1 Cleaning the Air Filter

Regularly cleaning the air filter is essential for maintaining your Fujitsu AC’s efficiency and indoor air quality. Turn off the power before removing the filter. Use a soft brush or vacuum to gently remove dust and debris. If heavily soiled, replace the filter according to the manufacturer’s instructions. Clean filters ensure better airflow, energy savings, and healthier air circulation. Always refer to your manual for specific guidance or contact Fujitsu support if unsure.

5.2 Routine Maintenance Checks

Regular maintenance ensures optimal performance and extends the lifespan of your Fujitsu AC. Inspect the drain pipe for blockages and ensure proper drainage. Check refrigerant levels and outdoor unit components for damage or debris. Schedule professional servicing annually to maintain efficiency and address potential issues early. Always consult the manual or contact Fujitsu support for detailed maintenance procedures.

Installation Guidelines

Ensure proper installation by qualified personnel to maintain safety and efficiency. Follow local regulations and manufacturer instructions for handling drain pipes, refrigerant lines, and electrical connections. Always refer to the official Fujitsu manual for specific installation requirements and guidelines to ensure correct and secure setup of your air conditioner.

6.1 Pre-Installation Requirements

Ensure the installation site is prepared, with proper space for both indoor and outdoor units. Verify electrical connections and refrigerant lines are compatible with the unit. Check local regulations and ensure proper drainage systems are in place. Confirm the unit’s specifications match the room’s dimensions and cooling requirements. Only authorized personnel should handle the installation process.

Ensure all necessary tools and materials are available. Review the official Fujitsu manual for specific pre-installation checks and guidelines. Ensure the area is clear of obstacles to facilitate smooth installation and operation. Proper preparation ensures safety, efficiency, and optimal performance of the air conditioner.

6.2 Step-by-Step Installation Process

Mount the indoor unit on a level surface, ensuring proper drainage. Install the outdoor unit on a stable base, away from obstacles. Connect refrigerant lines and electrical connections, following the manual’s guidelines. Secure all pipes and wires tightly. Test the unit for leaks and proper operation. Ensure all safety precautions are followed during the process. Only qualified technicians should handle refrigerant connections and electrical wiring.

Energy Efficiency and Savings

  • Optimize energy use with Fujitsu’s inverter technology for consistent temperatures.
  • Utilize energy-saving modes to reduce consumption during operation.
  • Adjust settings to balance comfort and energy efficiency effectively.

7.1 Understanding Energy-Saving Modes

Fujitsu air conditioners feature energy-saving modes that optimize performance while reducing power consumption. The inverter technology ensures consistent temperatures with minimal energy use. Use the timer and sleep functions to regulate operation during non-peak hours. These modes balance comfort and efficiency, helping you save energy without compromising cooling or heating performance.

7.2 Optimizing Energy Consumption

Optimize energy use by utilizing inverter technology for consistent temperatures with minimal consumption. Regularly maintain filters and ensure proper installation to enhance efficiency. Set optimal temperatures and use programmable timers to align operation with your schedule. These practices reduce energy waste while maintaining comfort, ensuring your Fujitsu AC operates efficiently and effectively year-round.

Warranty and Support

Fujitsu ACs come with a comprehensive warranty covering parts and labor. For support, contact Fujitsu via their official website or authorized service centers for assistance and service requests.

8.1 Warranty Terms and Conditions

Fujitsu air conditioners are covered by a warranty that varies by model and region. Typically, it includes coverage for parts and labor for a specified period. Valid claims require proper installation by authorized personnel and adherence to usage guidelines. Damages from misuse or unauthorized modifications may void the warranty. Refer to the official manual or contact Fujitsu support for detailed terms and conditions.

8.2 Contacting Fujitsu Support

For assistance, visit the official Fujitsu website to find contact details. Use the support hotline, email, or live chat for inquiries. Ensure to have your model number and serial number ready for efficient service. Refer to the manual or website for regional support options and operating hours to resolve issues promptly and effectively.

Additional Resources

Visit the official Fujitsu website for downloadable manuals, FAQs, and model-specific guides. Explore resources like energy calculators and contractor locators to enhance your air conditioner experience.

9.1 Official Fujitsu Manuals and Guides

Fujitsu provides comprehensive manuals for air conditioner models, including user guides, installation instructions, and service manuals. These resources are available on Fujitsu’s official website, offering detailed information on operation, troubleshooting, and maintenance. Download specific manuals like AOYG45LAT8 or ARTG30LHTA for in-depth guidance tailored to your AC model, ensuring optimal performance and compliance with manufacturer recommendations.

9.2 Frequently Asked Questions

  • Q: Why isn’t my Fujitsu AC turning on? A: Check power supply, remote battery, and ensure the timer is not active.
  • Q: How often should I clean the air filter? A: Clean every 2-3 months to maintain efficiency and air quality.
  • Q: What does error code E1 mean? A: E1 indicates a sensor issue; contact Fujitsu support for assistance.
  • Q: Can I set a timer for overnight operation? A: Yes, use the timer function to schedule start/stop times.
  • Q: Why is water leaking from the indoor unit? A: Check drain hose for blockages; ensure proper installation.
  • Q: Why isn’t the AC cooling properly? A: Ensure filters are clean, thermostat is set correctly, and outdoor unit is unobstructed.

canon 7d user manual

The Canon EOS 7D Mark II is a high-performance DSLR camera designed for professional photographers and enthusiasts. Its advanced features, including fast autofocus and durable construction, make it ideal for capturing high-quality images in various conditions. The official user manual, available on Canon’s website, provides detailed guidance on unlocking its full potential.

1.1 Overview of the Canon EOS 7D Mark II

The Canon EOS 7D Mark II is a high-performance DSLR camera designed for professional photographers and enthusiasts. It features a 20.2MP APS-C CMOS sensor, dual-pixel AF, and weather-sealed construction. The camera is known for its fast autofocus, robust build quality, and ergonomic design. It is suitable for wildlife, sports, and portrait photography. The official user manual, available on Canon’s website, provides detailed instructions for optimizing its features. This guide helps users unlock the camera’s full potential, ensuring exceptional image quality and versatility in various shooting conditions.

1.2 Key Features and Specifications

The Canon EOS 7D Mark II boasts a 20.2MP APS-C CMOS sensor, delivering high-resolution images with excellent detail. It features dual-pixel AF for precise autofocus and weather-sealed construction for durability. The camera supports continuous shooting at up to 10fps, making it ideal for action and wildlife photography. Additional features include a vari-angle 3-inch touchscreen LCD, built-in GPS, and wireless connectivity options. These specifications ensure versatility and performance, catering to both professional and enthusiast photographers.

Camera Controls and Customization

The Canon EOS 7D Mark II offers intuitive controls, including a customizable Quick Control Dial and buttons, allowing users to tailor settings to their preferences for enhanced shooting efficiency.

2.1 Understanding the Camera Layout

The Canon EOS 7D Mark II features a logical and ergonomic design, with controls positioned for easy access. The top plate includes the mode dial, AF-ON button, and LCD panel for quick setting adjustments. The rear houses the main command dial, Quick Control Dial, and a vari-angle touchscreen LCD. Customizable buttons allow users to assign frequently used functions. The weather-sealed body ensures durability in harsh conditions, while the intuitive layout simplifies operation, making it ideal for both professionals and enthusiasts seeking precision control.

2.2 Customizing Camera Settings

The Canon EOS 7D Mark II allows extensive customization to suit individual preferences. Users can assign functions to customizable buttons, such as the AF-ON or depth-of-field preview buttons, streamlining their workflow. The My Menu feature enables saving frequently used settings for quick access. Additionally, custom shooting modes (C1, C2, C3) can be configured to store unique camera setups. These options enhance efficiency and personalization, allowing photographers to tailor the camera to their specific needs and shooting styles for optimal performance in various scenarios.

Shooting Modes and Settings

The Canon EOS 7D Mark II offers versatile shooting modes, from manual controls to scene-specific settings, empowering photographers to capture stunning images in diverse lighting and creative scenarios.

3.1 Manual Shooting Modes (M, Av, Tv, P)

The Canon EOS 7D Mark II features four manual shooting modes: Manual (M), Aperture Priority (Av), Shutter Priority (Tv), and Program (P). These modes offer precise control over exposure settings, allowing photographers to tailor their shots to specific creative visions. In Manual mode, both aperture and shutter speed can be adjusted manually. Aperture Priority (Av) lets users set the aperture while the camera adjusts the shutter speed. Shutter Priority (Tv) allows for manual shutter speed selection with automatic aperture adjustment. Program mode provides a balance between automatic settings and manual overrides, offering flexibility for various shooting conditions. These modes are essential for photographers seeking advanced control over their images.

3.2 Scene Modes and Creative Filters

The Canon EOS 7D Mark II offers a variety of Scene Modes tailored for specific shooting scenarios, such as Portrait, Landscape, Sports, and Close-up. These modes automatically optimize camera settings for ideal results. Additionally, Creative Filters like Grainy B&W, Soft Focus, and Miniature Effect enable photographers to apply artistic styles directly in-camera. These features simplify capturing stunning images without manual adjustments, making them accessible for photographers of all skill levels while enhancing creativity and versatility in different situations.

Autofocus and Metering Modes

The Canon EOS 7D Mark II features advanced autofocus with 65 all-cross-type points for precise tracking and metering modes like Evaluative, Center-Weighted, and Spot for accurate exposure control.

4.1 Autofocus Features and Configuration

The Canon EOS 7D Mark II boasts a sophisticated autofocus system with 65 all-cross-type AF points, ensuring enhanced accuracy and speed. Users can configure AF modes, such as One-Shot AF for stationary subjects and AI Servo AF for tracking moving objects. The AF points can be manually selected or automatically chosen based on the scene. Additionally, the camera supports AF point expansion, allowing for more precise focus acquisition. Customizable AF settings enable photographers to tailor the system to their specific needs, optimizing performance in various shooting scenarios.

4.2 Metering Modes and Exposure Control

The Canon EOS 7D Mark II offers four metering modes: Evaluative, Center-Weighted, Partial, and Spot. Evaluative metering analyzes the entire scene for balanced exposure, while Center-Weighted prioritizes the center. Partial metering focuses on a specific area, and Spot metering measures light from a precise point. Exposure compensation allows adjustments of ±5 stops, enabling fine-tuning of brightness. Auto Exposure Lock (AE Lock) fixes exposure settings for consistent results. These features provide precise control over lighting conditions, ensuring optimal image quality in various shooting scenarios.

Image Quality and File Formats

The Canon EOS 7D Mark II delivers exceptional image quality with support for RAW and JPEG file formats, offering flexibility in editing and storage. High-resolution photos are captured with precise detail and color accuracy, ensuring professional-grade results for photographers.

5.1 RAW and JPEG File Formats

The Canon EOS 7D Mark II supports both RAW and JPEG file formats, offering photographers flexibility in capturing images. RAW files store complete data from the camera sensor, enabling extensive editing capabilities without loss of quality. JPEG files, on the other hand, are compressed and processed in-camera, resulting in smaller file sizes ideal for sharing. The camera allows simultaneous recording of RAW and JPEG files, catering to different workflow needs. Understanding these formats is essential for optimizing image quality and storage efficiency, as detailed in the user manual.

5.2 White Balance and Color Settings

The Canon EOS 7D Mark II offers advanced white balance and color settings to ensure accurate and vibrant image capture. The camera provides multiple white balance options, including Auto, Daylight, Shade, Tungsten, Fluorescent, and Flash, as well as a custom setting for precise control. Additionally, color settings allow photographers to adjust color profiles and styles, enhancing creativity and consistency in their work. These features are detailed in the user manual, enabling users to optimize their camera settings for various lighting conditions and artistic preferences.

Memory Cards and Storage

The Canon EOS 7D Mark II supports SDXC and SDHC memory cards, offering dual card slots for versatile storage management and enhanced backup capabilities during shooting sessions.

6.1 Compatible Memory Cards

The Canon EOS 7D Mark II is compatible with SDXC and SDHC memory cards, ensuring high-speed data transfer and ample storage for large image files. Dual card slots allow for flexible storage options, such as separating RAW and JPEG files or creating instant backups. The camera supports UHS-I cards for optimal performance, particularly when shooting in continuous modes or recording video. For 4K video recording, U3-rated cards are recommended to maintain smooth performance and prevent buffering. Always use high-quality cards from trusted manufacturers to ensure reliability and performance.

6.2 Managing and Formatting Memory Cards

Properly managing and formatting memory cards is essential for optimal performance with the Canon EOS 7D Mark II. Formatting a card deletes all data, so always back up important files first. Use the camera’s menu to format the card, ensuring it is initialized for the EOS 7D Mark II. Cards formatted by other devices may not function correctly. Regular formatting helps maintain card health and prevents errors. Avoid using cards formatted for other cameras to ensure compatibility and reliable performance during shooting sessions.

Video Recording and Playback

The Canon EOS 7D Mark II supports high-quality video recording with customizable settings. Users can capture sharp HD footage and playback videos directly on the camera’s LCD screen.

7.1 Video Shooting Modes and Settings

The Canon EOS 7D Mark II offers versatile video shooting modes, including manual controls for aperture, shutter speed, and ISO. Users can record in Full HD at up to 60fps, ensuring smooth motion. Customizable settings allow for precise control over focus, exposure, and audio levels. The camera also supports time-lapse and HDR video modes, enhancing creativity. With its intuitive interface, the 7D Mark II is ideal for both casual and professional videographers, delivering high-quality footage tailored to individual preferences.

7.2 Playback and Editing Options

The Canon EOS 7D Mark II offers convenient playback and editing features. Users can review images and videos directly on the camera’s LCD screen, with options to zoom in, scroll, and skip frames. The camera supports in-camera editing, allowing users to trim video clips and adjust settings like brightness and color balance. Additionally, the EOS Utility software enables seamless transfer of files to a computer for further editing. This combination of tools makes post-production efficient and accessible for photographers and videographers alike;

Connectivity and Transfer Options

The Canon EOS 7D Mark II features HDMI and USB connectivity for easy image and video transfer to external devices. The EOS Utility software simplifies file transfers to computers, allowing users to manage and edit their content efficiently.

8.1 HDMI and USB Connectivity

The Canon EOS 7D Mark II offers HDMI and USB connectivity for seamless integration with external devices. The HDMI output allows users to review images and videos on external monitors or HDTVs. USB connectivity supports high-speed data transfer to computers, enabling quick backup and editing. The USB 3.0 interface ensures fast and efficient file transfers. Additionally, the camera supports GPS device connectivity via USB for geotagging images. These connectivity options enhance workflow efficiency and provide versatile sharing and editing capabilities for photographers. EOS Utility software further streamlines image transfer and editing processes.

8.2 Transferring Images to a Computer

Transferring images from the Canon EOS 7D Mark II to a computer is straightforward using USB connectivity or a memory card reader. The USB 3.0 interface ensures fast transfer speeds, while the EOS Utility software simplifies the process. Users can select specific images or transfer entire folders. The camera also supports wireless image transfer via compatible devices, though this requires additional setup. Properly formatting memory cards and organizing files before transfer helps maintain efficient workflow. Always use the provided software or trusted card readers to ensure data integrity and avoid corruption during transfer.

Maintenance and Troubleshooting

Regularly clean the sensor and lens to prevent dust and smudges. Update firmware for optimal performance. Refer to the manual for troubleshooting common issues like error messages.

9.1 Cleaning and Maintaining the Camera

Regular cleaning is essential to maintain the Canon EOS 7D Mark II’s performance. Use a soft, dry cloth to wipe the camera body and lens. For the sensor, use a blower or cleaning swab. Avoid touching the lens surface to prevent smudges. Refer to the user manual for detailed cleaning instructions. Proper maintenance ensures sharp images and prevents dust buildup. Clean the viewfinder and LCD screen with a microfiber cloth. Store the camera in a dry, cool place to prevent moisture damage. Regularly update firmware for optimal functionality.

9.2 Common Issues and Solutions

Common issues with the Canon EOS 7D Mark II may include error messages, memory card errors, or autofocus malfunctions. For error messages, restart the camera or update the firmware. Memory card errors can often be resolved by formatting the card in the camera. Autofocus issues may require adjusting settings or cleaning the sensor. For connectivity problems, ensure proper cable connections or use EOS Utility for image transfer. Always refer to the user manual for troubleshooting steps. Regular maintenance and firmware updates help prevent such issues and ensure optimal performance.

The Canon EOS 7D Mark II is a powerful and versatile DSLR camera, offering advanced features for both photography and videography. Its robust design, fast autofocus, and high-quality image output make it a favorite among professionals and enthusiasts alike. The official user manual is an essential resource for mastering its capabilities, providing detailed instructions for settings, troubleshooting, and maintenance. By following the guide, users can fully utilize the camera’s potential and achieve exceptional results. Regular updates and proper care ensure long-term performance, making the EOS 7D Mark II a reliable choice for creative endeavors.

manual motorola talkabout

The Motorola Talkabout series offers reliable two-way radios designed for outdoor and emergency communication. This manual provides essential guidance for optimal use, safety, and functionality of these devices.

1.1 Overview of Motorola Talkabout Radios

The Motorola Talkabout series offers a range of two-way radios designed for reliable communication in outdoor and emergency situations. Popular models like the T42, T6200, and T6220 provide multiple channels and subcodes to minimize interference. These radios are FCC-approved for use across the U.S. and feature emergency functions like SOS alerts. Equipped with durable designs, they include accessories such as antennas and belts for convenient use. The manual ensures easy setup and optimal performance for all users.

1.2 Importance of the Motorola Talkabout Manual

The Motorola Talkabout manual is crucial for safe and effective use of the radios. It provides detailed instructions on handling antennas, complying with RF exposure limits, and understanding emergency features. The manual also guides users through troubleshooting common issues and optimizing performance; By following the manual, users can ensure compliance with legal standards and maximize their communication experience, making it an essential resource for all Motorola Talkabout radio owners.

Key Features and Specifications

Motorola Talkabout radios offer multiple channels, long-range communication, and durable designs. They feature weather resistance, extended battery life, and compatibility with branded accessories for enhanced performance and reliability outdoors.

2.1 Channels and Frequency Range

Motorola Talkabout radios provide up to 16 channels and operate on Family Radio Service (FRS) frequencies. They support 121 subcodes, combining 38 CTCSS tones and 83 DCS codes, ensuring clear communication. The devices are optimized for use in the United States and other FCC-approved regions, offering reliable connectivity in both urban and remote environments.

2.2 Battery Life and Charging Options

Motorola Talkabout radios offer robust battery life, supporting up to 16 hours of continuous use. They typically use rechargeable NiMH batteries, with optional alkaline battery support. Radios come with micro-USB charging cables and wall adapters, ensuring convenient charging. Some models feature energy-saving modes to extend battery life, and users can monitor battery levels via indicator lights. Proper charging and maintenance are detailed in the user manual for optimal performance.

2.3 Durability and Weather Resistance

Motorola Talkabout radios are built for outdoor use, offering durability and weather resistance. Many models feature IP67 ratings, protecting against dust and water immersion up to 1 meter for 30 minutes. They withstand harsh environments, making them ideal for rugged conditions. The manual emphasizes using Motorola-approved accessories to maintain weather resistance and ensure optimal performance in challenging outdoor scenarios.

Safety Precautions and Guidelines

Always follow the Motorola Talkabout manual for safe usage. Handle antennas and accessories carefully to avoid burns or damage. Ensure compliance with RF exposure limits for user safety.

3.1 Handling Antennas and Accessories Safely

Handle antennas and accessories with care to avoid damage or injury. Avoid touching antennas during operation to prevent burns. Use only Motorola-approved parts to ensure safety and compliance with RF exposure limits. Damaged accessories may compromise performance and safety. Regularly inspect antennas for wear and tear. Follow the user manual for proper installation and maintenance to maintain durability and functionality. Never modify antennas, as this can void safety certifications and warranties.

3.2 Compliance with RF Exposure Limits

Ensure compliance with RF exposure limits to maintain safety. Use only Motorola-approved antennas, batteries, and accessories to prevent exposure risks. Avoid modifying devices, as this can violate safety standards. Follow guidelines in the manual for proper usage and handling. Keep devices away from direct contact with the body during operation. Always prioritize safety to adhere to regulatory requirements and protect user health. Consult the manual for detailed RF exposure information and precautions.

Pairing and Setup

Pairing Motorola Talkabout radios is straightforward with easy-to-follow guides in the manual. Setting up subcodes ensures secure communication, enhancing your overall experience with clear instructions provided.

4.1 Easy Pairing Guide

Pairing Motorola Talkabout radios is a straightforward process. Users can easily connect devices by setting the same channel and subcode on both radios. The manual provides clear instructions, ensuring a seamless setup. A key tip is to set the subcode to zero for initial pairing, which simplifies the process. This ensures reliable communication and reduces interference, making it ideal for both beginners and experienced users alike.

4.2 Setting Up Subcodes for Communication

Setting up subcodes on Motorola Talkabout radios enhances communication clarity by reducing interference. Users can select from 121 subcodes, including CTCSS and DCS options. To set subcodes, navigate to the menu, choose the desired code, and ensure both radios have the same settings. This ensures private and clear communication between paired devices, optimizing your experience in various environments.

User Manual Highlights

The Motorola Talkabout manual provides essential safety guidelines, product specifications, and setup instructions. It ensures users understand features, operation, and troubleshooting for optimal device performance and safety.

5.1 Navigating the Motorola Talkabout Manual

The Motorola Talkabout manual is a comprehensive guide designed to help users understand and utilize their two-way radios effectively. It is organized into clear sections, including safety guidelines, product specifications, and step-by-step instructions for setup and operation. Users can easily navigate through troubleshooting tips, optimal performance advice, and detailed explanations of advanced features. The manual also highlights essential sections like channel selection, subcode settings, and emergency functions, ensuring a smooth and intuitive user experience.

5;2 Essential Sections Every User Should Know

The Motorola Talkabout manual includes key sections that ensure safe and effective use of the device. Users should familiarize themselves with safety precautions, such as proper antenna handling and RF exposure limits. Additional essential sections cover channel setup, subcode configuration, and battery management. These guides provide clear instructions to maximize communication range and address common issues, ensuring optimal performance in various environments, including outdoor and emergency scenarios.

Troubleshooting Common Issues

The Motorola Talkabout manual helps resolve common issues like connectivity and audio problems, ensuring smooth communication. It provides practical solutions for optimal performance troubleshooting.

6.1 Resolving Connectivity Problems

Connectivity issues with Motorola Talkabout radios can often be resolved by ensuring subcodes match between devices. Verify antennas are undamaged and fully extended. Restarting the radio or resetting it to factory settings may also resolve connection problems. If issues persist, refer to the manual for specific troubleshooting steps or reset subcodes to zero for easy pairing. Proper antenna use and settings alignment are key to maintaining reliable communication.

6.2 Addressing Audio and Reception Issues

To resolve audio issues, ensure the volume is adjusted properly and the speaker is not blocked. For reception problems, check antenna alignment and move to a location with fewer obstructions. Verify subcodes match between devices and avoid using non-Motorola approved accessories. If issues persist, reset the radio to factory settings or consult the manual for advanced troubleshooting steps to restore clear communication.

Tips for Optimal Performance

For best results, use high-quality antennas and Motorola-approved accessories. Ensure batteries are fully charged and avoid obstructing the antenna. Regularly clean the device and store it properly.

7.1 Maximizing Communication Range

To maximize communication range, ensure a clear line of sight between devices. Avoid obstacles like buildings or dense vegetation. Use high-quality antennas and Motorola-approved accessories. Position antennas vertically for optimal performance. Ensure both radios are set to the same channel and subcode. Regularly test signal strength and adjust positions as needed. Avoid physical obstructions and maintain a reasonable distance to extend range effectively.

7.2 Conserving Battery Life

Use Motorola-approved batteries and chargers to maintain performance. Minimize backlight and volume usage to reduce drain. Enable power-saving mode and turn off devices when not in use. Avoid extreme temperatures and overcharging. Clean battery terminals regularly for optimal contact. Store batteries properly when unused for extended periods. These practices help extend battery life and ensure reliable communication during critical moments.

Outdoor and Emergency Use

Motorola Talkabout radios are designed for reliable outdoor communication in remote areas, offering durable construction, emergency features, and long-range capabilities to ensure connectivity when it matters most.

8.1 Using Motorola Talkabout in Remote Areas

Motorola Talkabout radios are ideal for remote areas, offering durable designs and weather-resistant features. With a range of up to 10 km, they ensure reliable communication in challenging environments. The devices are equipped with long-lasting batteries and emergency features like flashlights and SOS signals, making them essential for outdoor adventures and survival situations where connectivity is crucial.

8.2 Emergency Features and Functions

Motorola Talkabout radios include essential emergency features such as SOS signals, emergency alerts, and built-in flashlights. These functions provide critical support during crises, enabling quick distress calls and enhanced visibility. Weather-resistant designs and long battery life further ensure reliability in survival situations, making the devices indispensable for emergencies in remote or off-grid locations.

The Motorola Talkabout manual provides comprehensive guidance for optimal use, ensuring safety, reliability, and ease of communication. Adhering to the manual maximizes performance and user satisfaction.

9.1 Importance of Adhering to the Manual

Adhering to the Motorola Talkabout manual ensures safe and efficient use of your device. It provides critical safety guidelines, such as handling antennas properly and complying with RF exposure limits. Following the manual helps prevent accidents, like minor burns from damaged antennas, and ensures optimal performance. Proper usage also extends battery life and maintains communication clarity. Always refer to approved accessories and settings for reliable operation.

9.2 Final Thoughts on Motorola Talkabout Radios

Motorola Talkabout radios are excellent for outdoor and emergency use, offering durability and reliable communication. Their easy pairing and long battery life make them ideal for remote areas. With features like weather resistance and emergency functions, they are a must-have for adventurers and first responders. By following the manual, users can maximize their performance and safety, ensuring seamless connectivity in any situation;

krups ice cream maker manual

Welcome to the Krups Ice Cream Maker Manual, your guide to creating delicious homemade ice cream. This manual helps you understand and use your machine effectively for perfect results every time.

Overview of the Krups Ice Cream Maker

The Krups Ice Cream Maker is a versatile and user-friendly appliance designed to craft delicious homemade ice cream with ease. With a 1.5-liter capacity, it allows for generous portions perfect for family gatherings or personal treats. The machine features an automatic churning function, ensuring a smooth and creamy texture every time. Its compact design and sleek aesthetics make it a great addition to any kitchen. Equipped with advanced cooling technology, it simplifies the ice cream-making process, enabling you to create customizable flavors effortlessly. Whether you’re a beginner or an experienced user, the Krups Ice Cream Maker offers a convenient and enjoyable way to indulge in your favorite frozen treats.

Importance of Reading the Manual

Reading the Krups Ice Cream Maker manual is essential for optimal performance and safety. It provides detailed instructions for assembling, operating, and maintaining the machine. The manual explains how to prepare ingredients, use the automatic timer, and troubleshoot common issues. Understanding the machine’s components and features ensures you make the most of its capabilities. Proper usage prevents damage and guarantees consistent results. Additionally, the manual offers maintenance tips, such as descaling and cleaning, to extend the machine’s lifespan. By following the guidelines, you can create delicious, customized ice cream while avoiding potential errors. It’s a comprehensive guide to enhancing your ice cream-making experience.

Key Components and Features of the Krups Ice Cream Maker

The Krups Ice Cream Maker features a robust design with an automatic timer and built-in compressor, enabling precise temperature control and consistent churning for perfect results every time.

Understanding the Machine Parts

The Krups Ice Cream Maker consists of key components designed for optimal performance. The churning bowl is where the ice cream mixture is frozen and churned. The lid ensures a secure fit during operation, while the paddle mixes and aerates the mixture. The control panel features buttons for setting the timer and monitoring progress. Additionally, the compressor enables automatic freezing without pre-chilling, making the process convenient. Each part is designed to work together seamlessly, ensuring smooth operation and consistent results. Familiarizing yourself with these components will help you use the machine efficiently and maintain it properly for years of delicious homemade ice cream.

Special Features for Customized Ice Cream

The Krups Ice Cream Maker offers features that allow you to craft unique, personalized frozen treats. With its adjustable churn speed, you can tailor the texture of your ice cream, from smooth and creamy to chunky and mixed-in. The built-in timer ensures precise control over churning time, preventing over-mixing. Additionally, the cooling function rapidly freezes the bowl, maintaining the perfect temperature for consistency. For added creativity, you can add mix-ins during the churning process, such as nuts, fruits, or candies, through the ingredient dispenser. These features empower you to experiment with diverse flavors and ingredients, making every batch of homemade ice cream truly customizable to your taste preferences.

Preparing for Ice Cream Making

Before churning, ensure all ingredients are fresh and prepped. Chill the mixing bowl and ingredients in the freezer for at least 6 hours to achieve optimal consistency and flavor. Proper preparation guarantees smooth operation and delicious results.

Ingredients and Mixing the Batter

Using fresh, high-quality ingredients is essential for the best ice cream flavor. Combine cream, sugar, and flavorings like vanilla or cocoa in a bowl. Ensure the mixture is smooth and well-blended to prevent ice crystals. For fruity variations, puree ripe fruits and strain seeds for a creamy texture. Avoid overmixing, as it can incorporate too much air, affecting consistency. Chill the batter in the refrigerator for at least 2 hours before churning to enhance flavor and texture. If using mix-ins like nuts or chocolate chips, fold them into the batter just before churning. Proper preparation ensures a smooth, even freeze and a professional finish. Always follow the manual’s guidelines for ingredient ratios and mixing times to achieve optimal results. This step sets the foundation for a delicious, custom ice cream experience. Keep the mixture within the machine’s capacity for best performance.

Chilling the Bowl and Ingredients

Proper chilling is crucial for optimal performance of the Krups Ice Cream Maker. The bowl must be pre-chilled in the freezer for at least 6-8 hours before use. Place it in the freezer without the lid to prevent moisture buildup. Ingredients, including the batter, should also be chilled for 2 hours to ensure they are cold when mixed. This step prevents large ice crystals from forming and results in a smoother texture. If using mix-ins like chocolate chips or nuts, chill them as well to maintain even freezing. Avoid over-hardening ingredients, as this can disrupt the churning process. Always store the bowl away from direct sunlight and moisture to preserve its cooling efficiency. Neglecting this step may lead to uneven freezing and a grainy texture, so careful preparation is essential for the best results.

Operating the Krups Ice Cream Maker

Operating the Krups Ice Cream Maker involves simple steps: add ingredients, select settings, and monitor progress. The machine ensures smooth, efficient, and enjoyable ice cream making.

Step-by-Step Churning Process

Begin by preparing your ice cream mixture according to your chosen recipe. Ensure the mixture is chilled thoroughly before proceeding. Pour the mixture into the pre-chilled bowl of the Krups Ice Cream Maker, making sure not to exceed the recommended maximum capacity of 1.5 liters. Next, select the desired timer setting based on your recipe or preference. Press the start button to initiate the churning process. The machine will agitate and aerate the mixture, gradually freezing it into smooth, creamy ice cream. Allow the machine to complete its cycle without interruption. Once the timer goes off, stop the machine and transfer the freshly churned ice cream to an airtight container for further hardening in the freezer, if desired. Always follow the guidelines to avoid overfilling, as this can lead to spillage during churning. Properly monitoring the process ensures a perfect texture and consistency. Regular maintenance, such as descaling and cleaning, is essential for optimal performance. Refer to the troubleshooting section for resolving any issues that may arise during operation. By adhering to these steps and maintaining your machine, you can consistently create high-quality homemade ice cream tailored to your preferences. For additional guidance, consult the detailed manual or online support resources provided by Krups. Happy churning!

Using the Automatic Timer

The Krups Ice Cream Maker features an automatic timer that simplifies the churning process. To use it, select the desired duration based on your recipe, typically between 20 to 45 minutes. Press the start button, and the machine will begin churning. The timer ensures consistent mixing and aeration, stopping automatically when the cycle is complete. For harder ice cream, transfer the mixture to an airtight container and freeze for 2-3 hours. Always monitor the timer to avoid over-churning, which can lead to icy textures. Regularly clean the machine post-use, especially the bowl and paddle, to maintain efficiency. For troubleshooting, refer to the manual or Krups support. Proper timer use guarantees perfect results. Enjoy your homemade treats!

Maintenance and Cleaning

Regularly clean the bowl, paddle, and lid with warm soapy water. Dry thoroughly to prevent rust. Descale every 3-6 months for optimal performance. Follow manual instructions for best results.

Best Practices for Cleaning the Machine

Regular cleaning is essential to maintain your Krups Ice Cream Maker’s performance and hygiene. After each use, wash the bowl, paddle, and lid with warm soapy water. Avoid abrasive cleaners or scrubbers to prevent damage. Dry all parts thoroughly to prevent rust. For tough residue, soak components in warm water before cleaning. Descaling is recommended every 3-6 months to remove mineral buildup. Use a descaling solution or vinegar mixture as per the manual’s instructions. Always rinse thoroughly after descaling. Cleaning tablets can also be used for deep cleaning. Refer to the manual for specific cleaning guidelines tailored to your model. Regular maintenance ensures optimal performance and longevity.

Descaling and Regular Maintenance

Descaling your Krups Ice Cream Maker is crucial to remove mineral buildup from hard water, ensuring optimal performance. Use a descaling powder or a vinegar solution every 3-6 months. Follow the manual’s instructions for the correct method. Regular maintenance includes checking and replacing worn parts, such as seals or the paddle. Lubricate moving components if recommended. Clean the exterior with a damp cloth to prevent dust buildup. Store the machine in a dry place when not in use. Refer to the manual for specific descaling and maintenance schedules tailored to your model. Proper upkeep extends the lifespan and ensures consistent ice cream quality. Always prioritize hygiene and functionality.

Troubleshooting Common Issues

Resolve frozen bowl problems by ensuring proper pre-chilling and ingredient temperatures. Address uneven mixing by checking blade alignment and ingredient ratios. Consult the manual for detailed solutions.

Resolving Frozen Bowl Problems

If your Krups Ice Cream Maker’s bowl becomes frozen, it may prevent proper churning. Start by ensuring the bowl is pre-chilled correctly for 6-8 hours. Avoid overfilling, as this can cause uneven freezing. If the bowl is already frozen, unplug the machine and let it thaw slightly. Check the power cord and ensure it’s connected properly. Verify that the automatic timer is functioning and not stuck. If the issue persists, refer to the manual for descaling or maintenance tips. Proper bowl preparation and ingredient temperatures are key to preventing this problem. Regular cleaning and maintenance can also help avoid operational issues. Always follow the guidelines provided in the manual for optimal performance. Ensure all parts are aligned correctly before use. This will help you achieve smooth and consistent ice cream every time. By addressing these steps, you can resolve frozen bowl issues effectively.

Addressing Uneven Mixing

Uneven mixing can occur if ingredients are not properly combined before churning. Ensure all components are well-mixed and the batter is smooth. Pre-chill the bowl for 6-8 hours to maintain consistent temperature. Avoid overfilling, as this can disrupt the churning process. If mixing issues arise, stop the machine, scrape down the bowl with a spatula, and restart. Check that the machine is on a level surface and all parts are securely aligned. Regularly clean the paddles and bowl to prevent residue buildup. For optimal results, follow the manual’s guidelines on ingredient quantities and preparation. Proper maintenance and adherence to instructions will help achieve a smooth, even texture in your ice cream. Always refer to the manual for specific troubleshooting tips. This ensures consistent and delicious results every time.

Master ice cream creation with your Krups maker. For more tips, visit official Krups support or sites like pickyourown.org for manuals and guides. Use descaling kits and FAQs for optimal performance.

Final Tips for Perfect Ice Cream

The key to perfect ice cream is using fresh, high-quality ingredients and ensuring proper chilling of the bowl and mix. Avoid overfilling the machine, as this can disrupt the churning process. For a creamier texture, maintain the ideal ingredient temperatures and ratios. Regularly clean and descale your Krups ice cream maker to prevent any buildup that could affect performance. Experiment with unique flavors and mix-ins for personalized creations. Always refer to the manual for specific guidelines, and consult online resources like pickyourown.org for additional troubleshooting tips. Happy churning!

Where to Find Additional Guides and Support

For further assistance, visit the official Krups website or trusted resources like pickyourown.org for comprehensive guides. The Krups USA site offers manuals, FAQs, and troubleshooting tips; Additionally, forums and review sites provide user experiences and solutions. Download the Krups support app for tutorials and maintenance advice. If issues persist, contact Krups customer support via email or phone for personalized help. Regular updates and new recipes are also available on their official social media channels. These resources ensure you maximize your ice cream maker’s potential and resolve any challenges efficiently.

generac 4000xl manual

The Generac 4000XL manual is a comprehensive guide for understanding and operating the generator effectively. It provides detailed instructions for installation‚ maintenance‚ and troubleshooting.

This manual is essential for ensuring safety and optimal performance of the 4000XL model‚ covering key features and operational guidelines for users.

1.1 Importance of the Manual

The Generac 4000XL manual is crucial for safe and efficient operation of the generator. It provides detailed instructions for installation‚ maintenance‚ and troubleshooting‚ ensuring optimal performance. Safety precautions‚ troubleshooting guides‚ and warranty information are included to help users avoid hazards and resolve issues quickly. Reading the manual thoroughly is essential to understand the generator’s capabilities and limitations‚ ensuring reliable power generation and extending its lifespan. It serves as a comprehensive reference for both novice and experienced users.

1.2 Overview of the Generac 4000XL Generator

The Generac 4000XL is a portable generator designed for reliable power generation. It offers a 4000-watt output‚ making it suitable for various applications‚ including camping and small-scale power needs. The generator features a durable design and extended-life components‚ ensuring longevity. Its portable construction allows for easy transportation‚ while the electrical schematic provided in the manual aids in understanding its internal workings. This model balances power and portability‚ catering to both residential and outdoor use.

2.Downloading the Generac 4000XL Manual

Downloading the Generac 4000XL Manual

The Generac 4000XL manual is downloadable as a PDF or text file‚ providing easy access to essential information. Visit websites like ManualsLib.com for the free download.

2.1 Sources for Downloading the Manual

The Generac 4000XL manual can be downloaded from various reliable sources‚ including ManualsLib.com and the official Generac website. Additionally‚ third-party platforms like PDF manuals databases offer free access to the document. Ensure to verify the authenticity of the source to avoid incorrect or outdated information. The manual is typically available in PDF and text formats‚ making it easy to access and print for reference. Always download from trusted websites to guarantee accuracy and safety.

2.2 PDF and Text File Availability

The Generac 4000XL manual is widely available in both PDF and text file formats. The PDF version is ideal for retaining the original layout and diagrams‚ while the text file offers flexibility for editing and easy searching. Both formats ensure that users can access the manual in a way that suits their preferences. These files can be downloaded from reputable sources like ManualsLib and Generac’s official website‚ ensuring quick and convenient access to essential information. Always choose the format that best meets your needs for optimal usability.

Understanding the Generator’s Components

The Generac 4000XL manual details the generator’s key components‚ including the engine‚ alternator‚ and control panel. It also provides electrical schematics for better comprehension of its operation.

3.1 Key Features of the 4000XL Model

The Generac 4000XL is an extended-life portable generator designed for reliability and durability. It features a robust engine‚ low-oil shutdown‚ and a durable steel frame for protection. The generator includes multiple outlets for versatile power supply and an easy-to-use control panel. Its compact design and portability make it ideal for various applications‚ ensuring consistent power delivery during outdoor activities or emergencies. The manual highlights these features to help users maximize its capabilities.

3.2 Electrical Schematics and Diagrams

The Generac 4000XL manual includes detailed electrical schematics and diagrams to help users understand the generator’s wiring and circuitry. These visuals guide installation‚ troubleshooting‚ and repairs‚ ensuring safe and correct connections. The diagrams highlight key components like outlets‚ circuit breakers‚ and grounding points‚ making it easier to identify and resolve issues. Referencing these schematics is crucial for maintaining the generator’s electrical integrity and ensuring optimal performance.

Installation and Setup Guidelines

The manual provides clear pre-installation requirements and a step-by-step installation process. Proper setup ensures safe operation and optimal performance of the Generac 4000XL generator.

4.1 Pre-Installation Requirements

Before installing the Generac 4000XL‚ ensure the site is level and well-ventilated. Check for proper clearance from flammable materials and ensure electrical connections comply with local codes. Review the manual for specific guidelines on placement and preparation to guarantee safety and efficiency during operation. Proper preparation prevents potential hazards and ensures the generator functions as intended. Always follow the manufacturer’s recommendations for a secure setup. Additionally‚ verify all components are included and undamaged before proceeding with installation.

4.2 Step-by-Step Installation Process

Begin by carefully unpacking the generator and ensuring all components are included. Place the unit on a level‚ stable surface‚ following the manual’s site preparation guidelines. Connect the electrical components as outlined‚ ensuring all wires are securely fastened. Refer to the electrical schematic for proper connections. Once installed‚ test the generator to confirm it operates smoothly. Always adhere to safety guidelines and manufacturer recommendations for a successful setup.

Safety Precautions and Guidelines

Always follow safety precautions to avoid hazards. Ensure proper ventilation‚ keep the generator out of reach of children‚ and adhere to all operational guidelines for safe use.

5.1 General Safety Tips

Reading the manual thoroughly is crucial for safe operation. Always ensure proper ventilation to prevent carbon monoxide buildup. Keep the generator out of reach of children and pets. Avoid operating it in wet conditions or near flammable materials. Regularly inspect the unit for damage or wear. Follow all operational guidelines to minimize risks. Ensure the generator is installed and maintained as specified to guarantee safe and reliable performance.

5.2 Hazard Warnings and Precautions

Warning: Carbon monoxide poisoning can occur if the generator is operated indoors or in poorly ventilated areas. Never use the generator near open flames or sparks. Keep it away from flammable materials. Ensure proper clearance from objects to avoid overheating. Do not operate the generator in wet conditions or without proper grounding. Always follow electrical safety guidelines to prevent shocks or fires. Failure to adhere to these precautions can result in serious injury or damage.

Maintenance and Storage Instructions

Regular oil changes and air filter cleaning are essential. Store the generator in a dry‚ well-ventilated area‚ cover it when not in use‚ and drain fuel or use a stabilizer. Always tie up cables neatly to prevent damage.

6.1 Regular Maintenance Tasks

Regular maintenance ensures optimal performance and longevity of the Generac 4000XL. Change the oil every 50 hours of use‚ clean or replace the air filter‚ and inspect the spark plug. Check the fuel system for leaks and ensure all connections are secure. Lubricate moving parts and inspect the battery terminals for corrosion. Always refer to the manual for specific intervals and procedures to maintain warranty validity and safe operation.

6.2 Proper Storage Techniques

Proper storage of the Generac 4000XL ensures readiness for future use. Store in a dry‚ well-ventilated area‚ away from direct sunlight and moisture. Draining the fuel tank or using a fuel stabilizer prevents degradation. Cover the generator with a breathable material to protect from dust. Disconnect the battery and store it separately in a cool‚ dry place. Regularly inspect stored components for damage or wear. Follow manual guidelines to maintain functionality and safety during storage periods.

Troubleshooting Common Issues

Identify and resolve common problems using diagnostic procedures outlined in the manual. Ensure proper functionality by addressing issues promptly and following recommended solutions for optimal performance.

7.1 Identifying Common Problems

The Generac 4000XL manual highlights common issues such as the generator not starting‚ low power output‚ or electrical connection problems. These problems often arise from fuel shortages‚ clogged air filters‚ or loose connections. Users should refer to the manual for step-by-step diagnostics to identify root causes. Regular maintenance‚ such as checking fuel levels and ensuring clean air filters‚ can prevent many of these issues. Early detection of problems ensures reliable performance and extends the generator’s lifespan.

7.2 Diagnostic Procedures and Solutions

The Generac 4000XL manual provides detailed diagnostic steps to identify and resolve common issues. For instance‚ if the generator fails to start‚ check the fuel level‚ air filter‚ and ignition system. Low power output may indicate overloaded circuits or faulty electrical connections. The manual recommends inspecting wires and ensuring proper grounding. Additionally‚ resetting the circuit breaker or replacing worn spark plugs can often resolve operational problems. Following these procedures ensures efficient troubleshooting and minimizes downtime for the generator.

Warranty Information and Support

The Generac 4000XL manual outlines warranty details‚ including coverage periods and conditions. It also provides contact information for customer support and service options for assistance.

8.1 Warranty Details and Coverage

The Generac 4000XL manual provides detailed warranty information‚ ensuring coverage for parts and labor under specified conditions. The warranty period varies depending on usage and registration‚ typically covering residential applications for a set duration. It outlines what is included and excluded‚ such as wear-and-tear components. Proper installation and maintenance are required to maintain warranty validity. Users are advised to review the manual thoroughly for specific terms and conditions to ensure compliance and full coverage benefits. Additional details can be found in the engine owner’s manual for supplementary warranty information.

8.2 Customer Support and Service Options

Generac offers comprehensive customer support for the 4000XL model‚ ensuring assistance is readily available. Users can access troubleshooting guides‚ repair services‚ and technical help through Generac’s official website or authorized service providers. Phone support is available for immediate inquiries‚ and online resources provide detailed maintenance and repair instructions. Additional support includes warranty claims assistance and optional extended service plans. Customers can also contact Briggs & Stratton for engine-related support‚ ensuring a robust network of assistance for optimal generator performance and longevity.